The Science Behind The Sizzle| Why Your Steak Seams Smell So Good| Grilled Recipes Ideas
Grilling isn’t just tossing burgers over the coals; it’s using science to make your food sing. The superstar behind the grill-bump flavor is the Maillard reaction. Keep it simple: when you heat meat, the amino acids and the little sugars inside it get to toasting. The sizzle you hear is the delicious chemistry happening—kinda like your meat baking, only the oven is the grill, the browning is the fan club, and the fan is the flame. That process cooks up tiny new flavors—flavors so small you can’t even see them, but they’re the ones giving your steak, salmon, or veggie its all-star grill-mark crust. So the next time you smell that smoky, salty, oh-my-goodness aroma, remember: Tiny science team partying on your food equals flavor firework show!
People often mix up the Maillard reaction with caramelization because they both make food turn brown, but they work in totally different ways. Caramelization is what happens when you heat sugar by itself, turning it into syrup that tastes sweet. To pull that off, you need the heat cranked to at least 320°F (160°C). Maillard, on the other hand, is more of a team effort between proteins and sugars. You can kick it off at a cooler 250°F (120°C). Because you’re combining ingredients, the flavors end up being a lot richer and more complex. Knowing which reaction you’re aiming for is key when you’re firing up the grill, since it tells you the right temperature and time to make your food taste its best.
To get the Maillard reaction cranking, you need the food to be hot and dry. If there’s water hanging out, the hottest it can get is the boiling point—212°F (100°C) at normal pressure. The trick to pro-level grilling is to get rid of that water super-fast, so the surface can spike into the Maillard zone, which is way hotter than boiling. A “hot grill” isn’t just a casual suggestion; it’s the science move to dry the outside out fast and kick off the reactions that make those awesome flavors. If you’ve ever had food stick to a lukewarm grill, this is the reason: the surface proteins haven’t dried out enough to form a crispy, browned crust that lets the food lift off the grates all by itself.
Preparation & Heat Management
The secret to nailing grill day lies in getting ready first. Always start with a spotless grill. Leftover bits don’t just stick to your burger; they can flare up and ruin your perfect steak. Grab a wire-free brush and give the grates a quick scrub both before and after each cook. For tough spots, whip up a paste with baking soda and water, or spray them with vinegar and wipe. Finish by spraying or wiping with a little oil using a paper towel on tongs—high-heat oil like vegetable or avocado works best. Don’t oil the food; that just causes mini explosions.
Getting the grill nice and toasty before you cook isn’t just a fancy tip on a YouTube video; it’s essentials. Fire it up and let it roll for 10 to 15 minutes. That grill surface needs to be hot enough to give your steak a sear, keep the juices inside, and make those perfect cross-hatch marks everyone loves. Plus, the heat helps the proteins release on their own, so the food doesn’t stick.
To level up your grilling game, forget the one-temp-for-all approach and go with the two-zone setup. At its simplest, you make two temperature islands on the grill: one hot (direct) and one cooler (indirect). The hot side cooks food straight over the flames where the heat is blazing, which is perfect for quick stuff like steaks, burgers, and peppers that really benefit from that crispy crust. The cooler side, on the other hand, sits next to the coals, so the food cooks by the warm air instead of flames. That’s where you send whole chickens and big roasts that need to cook through evenly without the outside turning to coal. With two zones, you have total power. Start by tossing that burger over the hot steel for killer grill marks, then slide it over to the cooler side to finish without it getting too dark. That slow and simple power move is the same one pros use in the fancy reverse sear trick to nail perfect medium-rare every time.
The Essential Kit for Backyard Chefs of All Levels
Don’t fool yourself: the best investment for any future grill champ isn’t the fanciest grill. It’s the trusty meat thermometer. This little gadget stops the hunching, staring, and worrying—and tells you exactly when meat hits the perfect temp so you dodge the “is it safe?” and “oops, too dry” moments. Second, don’t sleep on grill baskets and skewers. They’re the secret move for keeping tiny stuff, like diced zucchini or shrimp, from doing the “see ya later” act right between the grill bars. Choose metal skewers whenever you can; the wooden ones have a bad habit of becoming tiny torches when they meet that blazing heat.
Let’s Talk Meats on the Grill
Mastering the Sear and the Sneaky Reverse Sear Trick
Searing is one of those classic tricks every grill master needs in their pocket: throw the meat on hot grates for a quick dance over the flames and boom—a tasty, crispy crust shows up. All that sizzling triggers something called the Maillard reaction, which is chef-code for “makes stuff taste awesome.” The only catch is this works best on thinner steaks. The heavier guys, like a ribeye that’s the size of a toddler’s Frisbee, need a little more love. The secret? Sneak in a technique called the reverse sear. Here’s how it goes: instead of starting hot, keep your meat on the cooler side of the grill until it’s almost the right temp. Then, move it over to the hot side for a final crusty sear. This way, the inside cooks evenly and the outside gets that great crunch. Trust me, your steaks will still be bragging about this trick.
Reverse searing flips the usual grilling game. Start by cooking the meat low and slow, slowly raising its inside temp, then finish it with a high-heat sear to lock in the goodness. This works best on thick cuts—about 1.5 to 2 inches or more—like ribeye, porterhouse, or filet mignon. The low temp makes the steak cook evenly all the way through, so you skip the usual problem of a burnt outside and a cold inside. Taking it easy at first also dries the steak’s surface, which is key for a fast, super-hot sear. When you finish with the blast of heat, you land a perfect dark crust, but the inside stays exactly where you want it—no overcooking, just great flavor.
Brining, Marinating, and Flavoring
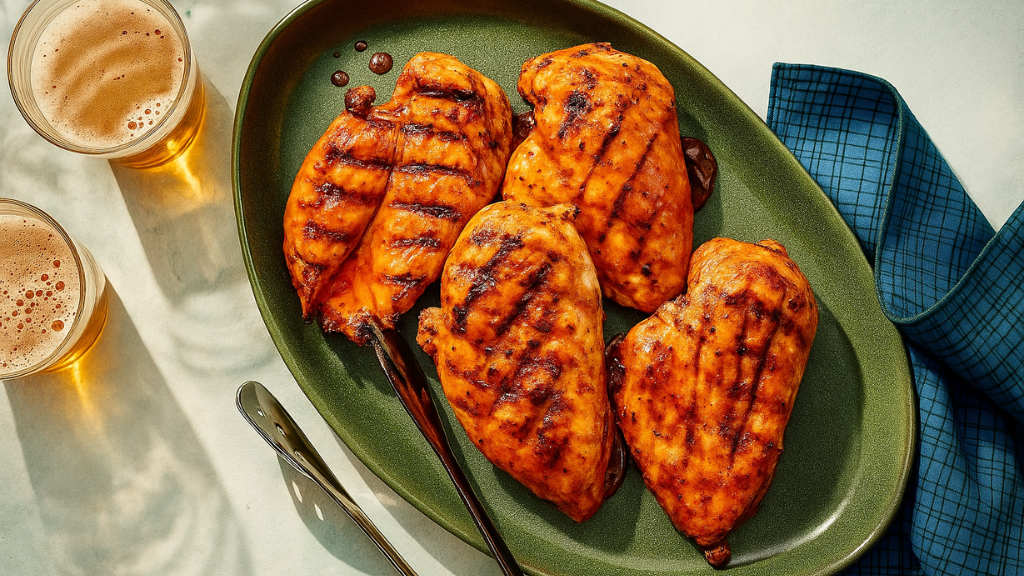
How you prep your meat before it sees that hot grill really matters and will change how it tastes and feels once it’s done. Brining means soaking meat in a salty water bath that, thanks to a little science magic called osmotic pressure, sends moisture right into the muscle. Lean proteins, think skinless chicken breasts, especially need this bath, since they can dry out faster than you can say “charcoal.” Brining acts like a shield, keeping juices locked in so you basically “overcooked it on purpose.” If your chicken comes off the grill dry and rubbery, it’s probably had too little brine or too much heat—kind of a classic rookie flock. One salty soak fixes the rest of the cook.
Marinating is when you soak meat in a tasty acidic sauce—like vinegar or citrus—so the outside gets a flavor boost. Lots of folks think the marinade makes meat tender the way a sponge soaks up water, but the acids really only work on the outer skin. They just don’t go deep enough to change the meat’s texture much. Also, remember to keep the marinating bowl in the fridge so everything stays safe. If you want to save that leftover marinade for brushing on the meat later, just remember it’s gotta be boiled first. That’ll kill off any germs from the raw meat.
A dry rub is another fun way to kick up flavor without a sauce. You mix up your favorite dry herbs and spices—like paprika, garlic powder, and mustard powder—then sprinkle that all over the meat and rub it in. Do it at least 15 minutes before your grill gets hot. The salt pulls a tiny bit of moisture to the surface, and that quick moisture and the spices together form a really tasty crust when the meat hits the heat.
Nailing the perfect burger, steak, or chicken every time starts with one trusty gadget—the meat thermometer. Lots of folks swear by the clock, but the truth is serious grill variations happen thanks to thickness, cut, and grill heat, which means a four-minute rule can steer you way off course. Learn those magic numbers and you’ll serve meat that’s not only cooked the way you like it but also safe to chow down on.
Why Waiting is Key to Better Meat
The last step in grilling and the one folks usually skip is giving the meat a little time to chill off the fire. When you take it off the grill, the temperature is super high, and that makes the muscle fibers tighten up and shove the juices toward the middle. If you slice it right away, all those meaty juices spill out, and you’re left with a dry piece of meat that you kinda have to chew like shoe leather. Let it rest instead: the fibers loosen up, the juices spread back through the meat, and you get a piece that’s super tender, really juicy, and a whole lot tastier. Quick guideline? Smaller cuts like steaks and chops need about 5 to 10 minutes. Bigger beasts like roasts want 10 to 15. Quit being impatient, and that last wait time is the secret to brag-worthy meat.
Common Challenges & Solutions
Nothing ruins a backyard cookout faster than a steak that comes off the grill drier than the Sahara. To fix that, try a quick pan rescue: pop the wee beast on the stove with a splash of water or beef broth, cover, and let it steam for a few. It’ll soak up some moisture without getting any grayer. If your steak is still a touch on the chewy side, a few drops of vinegar or lemon juice can soften the fibers and perk it up. And if it’s a lost cause, shred the meat, toss it with BBQ sauce or salsa, and pile it into tacos or a hoagie. It’s a killer way to rescue the dinner and keep the party going.
Grilling Fish & Seafood
Gotta Tweak Your Technique
Grilling fish is way different from grilling burgers and steaks, and if you don’t change your approach, you’ll end up with sad flakes stuck on the grate. The trickiest bit is keeping the fish from gluing itself to the metal and falling apart the minute you try to turn it. Here’s the deal: fish muscle is made of tiny, short strips called myomeres, and each strip is separated by thin sheets of gooey connective tissue. When the heat hits, those strips love to stick to the grill if you poke the fish too soon. The pro tip isn’t to pry the fish free with a spatula or a ton of cursing. Instead, build a barrier—oil, seasoning, or a fish tray—and just let the heat do its thing. When the protein cooks and the myomeres firm up enough, the fish will quietly let go of the grill, and a simple nudge will flip it in one neat piece.
Don’t Let It Stick
Getting beautiful, non-sticky fish off the grill comes down to a quick oiling trick and a little waiting. First, grab a high-heat oil like vegetable or avocado and own the grill grates. Don’t just splash some on—use a paper towel to rub a thin, even coat. This isn’t a one-and-done deal. A few coats bond and season the grates like a well-used cast-iron skillet until they shine and stop sticking. For flaky fish, a few even coats are a must. While the grill heats, brush the fish front and back with a thin tracer of the same oil to keep it fishy-crusty.
Now you’re ready: lay the fish on the hot grate and just walk away. No poking, no peeking. The fish will let go when a perfect golden crust forms. If you try to lift it too early, you’ll leave half the skin behind.
Direct, Plank, Pouch, & Basket
There’s a handful of cool ways to grill fish, and the route you pick should match the type of fish you’ve got and how you want it to taste.
Context ‘Grilling: You probably see this one most on backyard grills, and it’s perfect for firmer fish like salmon, sea bass, and halibut. Start with the fish skin-side down on the oiled grates. The skin crisps up and helps keep the fish juicy so it won’t stick when you’re ready to flip. Just let it do its thing.
Plank over Illogo: Grab a nice cedar, maple, or alder plank and soak it in water until it’s like a sponge. Once it’s ready, lay it directly on the grill grate. Plop your well-seasoned fish down on the plank. The wood seals in moisture so the fish stays juicy, and it adds a mellow smoky flavor that’s mellower than the chips do. When the fish is ready, just slide that plank straight to the table. Boom—instant dinner-party magic with no extra cleanup.
The Foil Pouch: This option keeps the grill chef in total cruise mode and is a lifesaver for soft stuff like sole, scallops, or shrimp. Lay a piece of heavy-duty foil on the counter, drizzle with olive oil, and toss on some herbs and your fish. Fold the edges like a present, carefully leaving a little air and steam inside, and toss the pouch on the grill. No flipping required; everything cooks and steams in its own little aluminum sauna. Plus, no losing a shrimp through the grates.
Grilling with Baskets & Skewers: Slip a well-seasoned fillet in a grilling basket if you want the super smoky flavor without the fish losing its shape when you turn it. The basket also keeps the coals off the fish. Skewers are the go-to for shrimp or stone-flesh fish—load up several chunks on a skewer, and you can flip them all in one motion without the fish falling apart.
How to Tell When Your Fish Is Just Right
Fish is a speed cook, and that makes timing everything. The pro feels for cues and also checks the thermometer. Perfect fish is opaque all the way through and flakes apart with a gentle fork. Look to the safe side, and you want the fish to hit 145°F (63°C). If you’re grilling salmon, that chalky white stuff you sometimes see is albumin—first sign you’re close. Even the skin can give you a reading: it stays see-through, and when it crisps up, you’re golden.
Grilling Vegetables
Why Grilling Greens Isn’t Just Sticking Stuff over Fire
When you toss veggies on the grill, the science dance is a little different from the one that happens with steak. Plants are packed with little walls made of stuff called cellulose, hemicellulose, and pectin. These walls are what keep your zucchini sticks crispy. Heat of any kind starts cracking those walls, and the trick isn’t to fully blast them to mush, it’s to soften just right so they bend with a little pressure while still holding on to a tiny bite. The grill master’s secret is fiddling with heat and timing until that perfect in-between shows up—just before the walls collapse into soggy disaster.
Pre-Grill Moves & Why Sweet Isn’t Always Simple
You don’t throw a pepper straight from the sink to the flames and hope for the best. Give them a rinse, pat them dry so they don’t steam, and slice to the size of a half-incher. If they’re in the tiny league—think cherry tomatoes or button mushrooms—keep them whole or slide them on a skewer so they don’t audition for the grill’s version of hide-and-seek down the grates. That little bit of prep keeps your fire from playing the surprise-card-on-you and keeps your veggies both tasting fab and looking like they came straight from a cookout magazine.
Marinating veggies for grilling is kind of a two-sided coin. Some folks say a good marinade boosts the taste, while others shake their heads and say “not so fast.” The one thing we all agree on is that a marinade loaded with sugar or acid can make veggies burn because they caramelize way too fast over that high, direct flame. Plus, acid and salt can turn crunchy cucumbers or eggplants into limp little sad sticks really quickly. The smarter move: just brush the veggies with a high-heat oil and whatever spices you like, right before they hit the grill. That way, they won’t stick, they’ll get gorgeously brown and crispy, and they’ll keep that nice snap.
The pro tip, the thing the BBQ Master would tell you, is to hit the veggies with the fancy, sugary, or acidy dressing once they’ve come off the grill — the veggies are warm and ready to soak up all that taste, but they’re safe from scorching and squishy ruin.
Veggie Grilling Cheat Sheet
Veggie Prep Style & How-To Got Time?
- Zucchini & Summer Squash: Knife in ½-in rounds or thin planks, go right over direct heat, medium-high 6 to 8 mins, flip every few mins.
- Bell Peppers: Chunk in big slabs or strips, medium direct heat does the trick, 8 to 12 mins, turn every 2 to 3 mins.
- Corn on the Cob: Keep husk on or off, spin to keep it even, direct heat, no fuss, 10 to 15 mins, just keep it rotating
- Mushrooms: Leave them whole or skewer the baby ones, direct heat, medium, 3 to 4 mins each side, so simple.
- Eggplant: Round, wedge, or half-moons, whatever you want, direct heat, can’t go wrong 8 to 10 mins, or 4 to 5 mins a side.
- Asparagus: Snip off the dry ends, direct heat, medium, 5 to 7 mins total, flip after 2 mins
- Onions: Chunk big rings or wedges, keep the root on, medium direct heat, 3 mins a side, easy flip
- Sweet Potatoes: Quick-boil or microwave to half-cook, medium heat on the grill 10 to 15 mins, slide them around a bit.
- Lettuce: Romains get chopped in half, root stays put, medium-low to medium-high, 2 to 3 mins a side, pretty cool, right?
Times change with veggie size, grill heat, and how you want them cooked. If you’re grilling a whole bunch, start with the ones that take longest first.
No More Mushy, Burnt, or Grate-Dropped Veggies
To keep your grilled veggies on point, dodge these rookie mistakes. First up, never throw dense veggies—like sweet potatoes or regular potatoes—onto the grill raw. They’ll blacken on the outside while still being a brick inside. Give ’em a quick zap in the microwave or boil ’em till they’re soft, then hit the grill. Burnt instead of grilled? That happens when you keep the heat blaring the whole time. Fire up high just long enough to mark ‘em, then slide them to the cooler side of the grill so they finish cooking without turning to charcoal. Got little guys like asparagus or grape tomatoes? Use a grill basket or thread them on skewers so they don’t go bail over the grates and into the flames. Keep these tips in your back pocket, and your veggies will look and taste amazing.
Comprehensive Grilling Safety & Recommendations
Keep It Safe the Whole Way
Staying safe while grilling starts the second you decide what to throw on those grates. Keep raw meat and poultry separate from everything else at the store—stick it in its own bag to keep juices from oozing onto the bag of chips. When you get home, pop those perishables in the fridge right away. If you need to thaw, the fridge is best, but you can also run the meat under cold water or zap it in the microwave on defrost if you’re grilling in the next few minutes.
Making a marinade? Set aside a bit before it touches raw meat; that saved cup can be the tasty glaze later. If you forget and dip first, that same sauce needs a good boil—three minutes is usually enough to zap any sneaky germs. And of course, switch platters and utensils; never let the same fork that handled raw chicken anywhere near the burgers you’re ready to grill.
Becoming a Grilling Ace, going from backyard rookie to pro on the grill is really about leveling up from “how to light the fire” to getting what happens to food in the heat on a cellular level. You nail it by knowing what every food is made of and tweaking the game plan for each. As the seasoned backyard commander, you realize that a seriously hot grate isn’t for show; it’s what kicks the Maillard magic into gear for that brown crust. You swear by the two-zone fire trick for hitting the sweet spot between sizzle and slow. You soak meat in a brine bath to lock in juice, then trust the thermometer instead of a guess for the ideal medium. When its fish night, a light touch and a non-stick surface keep the delicate proteins from getting ripped apart. You grasp how veggies turn to sweet, smoky candy and slice, skewer, or oil them to reach the sweet spot of firm yet charred. Applying these backyard science hacks in real time turns every meal from “just OK” to “who, me?”-worthy, making the grill not just another tool, but a canvas that proudly shouts, “Look what this craft can do at a hundred degrees and rising!”
FAQs
Why Does My Food Stick to the Grill?
Food sticks to the grill mainly because the grates aren’t hot enough. When the grill is only warm, the proteins in the meat or veggies don’t dry out enough to form a crispy, golden crust. That crust is what keeps the food from tearing when you try to flip it. To keep your meal from gluing itself to the grates, fire up the grill and let it preheat for at least 10 to 15 minutes. Don’t forget to swipe a paper towel with oil across the grates right before you start cooking, too. It’s a small step that makes a big difference.
Difference between Maillard Reaction and Caramelization!
Both the Maillard reaction and caramelization create that lovely browning and add extra flavor, but they each have a different process.
- Maillard Reaction: This reaction happens between amino acids and sugars when proteins—like those in meat or tofu—are heated. That’s what gives grilled proteins their umami, smoky, and slightly nutty flavor. The reaction kicks off around 250°F (120°C), so a good sear is essential.
- Caramelization: When you heat sugar on its own, the molecules break down and reorganize, creating a sweet, nutty flavor. This process starts at a higher temperature—at least 320°F (160°C)—so it’s the secret behind the golden glaze on grilled fruits and the crust on sweet glazes.
Both reactions transform food and make it extra delicious, so get that grill hot! Knowing the difference between two zones on the grill is the key to that amazing, deep-brown crust on a steak everyone loves.
Why should I set up my grill with two zones?
A two-zone grill setup is like creating a mini temperature control tower. You’ll have one side that’s screaming hot and another side that’s just warm. Here’s the deal:
- Hot side: This is where you throw on the steak, burgers, or any veggie you want to char. The direct heat sears the surface, locking in juices and building that killer crust.
- Cool side: The indirect heat is where the magic really happens. You can move your steak to this side after searing, or slide on a whole chicken or a thick roast and let it cook through without the risk of burning. Everything finishes evenly and beautifully.
This setup keeps you from slicing into a steak that’s cold in the middle or a chicken that’s crispy outside but raw inside. It’s basically the pro’s secret to nailing the perfect reverse sear.
How do I keep fish from sticking to the grill?
To keep fish from sticking, set up a barrier and be patient. Start by preheating the grill until the grates are nice and hot, then scrape them clean. Lightly brush the fish and the hot grates with a high-smoke-point oil like avocado or grapeseed oil. When you place the fish on the grill, resist the urge to move it. Leave it alone until a golden crust appears on the bottom. When the fish is ready to flip, it will release from the grates on its own.
When should I use a marinade versus a dry rub?
- Marinades are ideal when you want to soak your meat in flavor. They usually contain acid, like lemon juice or vinegar, which gently tenderizes the surface and infuses a bright, tangy taste. Keep your fish or chicken in the marinade for at least 30 minutes, but don’t go overboard—30 to 60 minutes is often enough.
- Dry rubs consist of spices, herbs, and salt you massage straight onto the meat. The salt pulls out a bit of moisture, which mingles with the spices and forms a tasty crust during cooking. Rubbing up to 1 hour in advance gives the salt time to work its magic without over-seasoning.
- For veggies, skip the marinades that are loaded with sugar or vinegar. Those high-acid or high-sugar mixes can scorch. Instead, just give the veggies a light brush of oil and sprinkle on some spices. Save the sauce and drizzle it on after the veggies are off the heat.
Why is letting the meat rest after grilling a big deal?
Because it’s the step almost nobody takes. When you pull meat off a hot grill, the muscle fibers tighten up and push the juices to the center. If you cut it right away, those juices pour out, and the meat dries up and feels tough. Rest it for a few minutes and the fibers relax. The juices go back where they should, and you end up with a slice that’s tender, juicy, and packed with flavor.
Can you grill meat that’s still frozen?
The short answer is no. Frozen meat can char and burn on the outside while the inside is still cold and unsafe. This not only gives you a tough, dry piece of meat, it can also bring up food safety issues. Always thaw your meat completely. Best methods: stick it in the fridge overnight, run cold water over it in a sealed bag, or zap it in the microwave on the defrost setting. Then your meat is ready for the grill.
How do I put out flare-ups without ruining dinner?
Flare-ups pop up when rendered fat drops onto the heat source and shoots up as fiery tongue of flame. They threaten to char your meal and ruin that sweet flavor.
Here’s the emergency game plan:
- Choose a safe parking space: Quickly shuffle your food to the cooler, indirect-heat side of the grill the split second you see flames heading up.
- Snug that lid: Batten the lid down. Less air means the flames have a harder time growing, so your grill will be its calm self again in a few moments.
- Give meat a haircut ahead of time: Trim away as much visible fat as possible before grilling. Less fat means fewer flare-ups in the first place.
How do I keep grill-worthy vegetables from doing the disappearing act?
Chopped veggies like bell pepper, onion, mushrooms, and cherry tomatoes need a safety net.
Grab one of these and keep your veggies on the grill and off the dirt:
- Grill basket: This allows you to toss, grill, and flip a whole stash in one go. The weave keeps the small chunks safe while heat gets in from every side.
- Skewers: Thread half a bell, a few mushrooms, and a cherry tomato on a skewer, then set the stick on the grill. Each piece stays put and the skewer acts like a grill lifeguard.
For larger pieces like sweet potatoes or whole cobs of corn, you can go straight on the grates. Just be sure to flip every few minutes for even grilling.
Why do some grilled vegetables end up mushy?
You don’t want mushy grilled veggies, and the culprits are usually steam and low heat. If the pieces are wet when they hit the grill or if the grill isn’t hot enough, they’ll softly steam instead of sear. To solve this, give your veggies a good pat dry after washing. Crank up the grill until it’s screaming hot to dry up any hidden moisture and kick off that tasty browning. For veggies that are dense, like sweet potatoes, give them a quick boil or zap in the microwave until they’re almost tender, then let them finish on the grill. That way they caramelize without going mushy or burning on the outside.
What is reverse searing and when should I try it?
Reverse searing flips the usual steak-cooking method. Instead of searing the steak first, you start on the cooler side of the grill. That means you place a thick steak—think ribeye or porterhouse—there and let it cook slowly until it’s almost at your target temperature. After that, you move it to the hot side for a short, high-heat sear. This way, the inside stays evenly cooked from edge to edge and the outside gets a beautiful, crunchy crust. It’s the ultimate way to reach that perfect medium-rare without the crust getting charred.
Can I reuse a marinade that touched raw meat to baste the cooked steak?
Nope, that’s a big safety no-no. A marinade that has been in contact with raw meat carries bacteria and should not go on the finished steak. The good news is that you can either reserve a portion of the marinade before it touches the meat or you can boil the leftover marinade for at least three minutes. Boiling it will kill any germs, making it safe to use for brushing and basting later.
What’s the easiest way to keep my grill clean?
The easiest way to clean the grill is while it’s still hot, both before and after cooking. When the grill is hot, take a wire-free grill brush and quickly scrape away any leftover scraps. Do the same thing after you’ve finished cooking, while it’s still warm. If you want a deeper clean, you can mix baking soda and water into a thick paste or spray the grates with vinegar, then sponge and rinse it off.
How can I check meat doneness without making a cut?
The best way to check meat doneness without risking valuable juices is to use a meat thermometer. If you cut into the meat, the yummy juices pour out, making it drier. Instead, push the thermometer into the thickest part, and look for the temperature that matches the doneness you want. This way, the meat is cooked the way you like it and safe to eat, without any waste.
Why shouldn’t I oil the food right before I grill?
Oiling the food before grilling might seem easy for flavor and non-stick benefits, but the article warns against it because the oil can drip onto the flames and create unwanted flare-ups. A quick workaround is to rub oil directly onto the grill grates. The grates absorb the oil, create a slick surface, and still let you get that coveted, golden-brown crust without any sudden bursts of flame ruining dinner.
What’s the point of brining, and which meats benefit the most?
Brining means soaking your meat in a salted water solution ahead of time. This is a game-changer for lean cuts like chicken breasts and pork chops, which tend to dry out fast on high heat. The salt and water are absorbed into the muscle, padding it with moisture that sticks around even if you cook the meat a bit longer than planned. The end result is juicy, tender meat that can handle a grilling oops without becoming shoe leather.
I overcooked my steak—can I salvage it? Not perfect, but salvageable.
You can’t switch a shoe-leather steak back to medium-rare, but you can still make it somewhat appealing. Start with the “pan rescue”: Put a splash of water or beef broth in a skillet over medium heat. Lay the steak in, cover it, and steam for one or two minutes. The steam helps push moisture back inside. Add a teaspoon of vinegar or lemon juice to the broth; their acid softly breaks down the fibers. If the steak is still too tough to save, slice it thin, against the grain. The grains are the long, fibrous lines—cut against them to shorten them, which removes toughness. Shred the steak into taco filling, stir-fry, or a sloppy joe-style sandwich with a zippy sauce. A little sauce or salsa goes a long way in hiding dryness, and your wasted dinner can still be a tasty win.
What’s the difference between grilling and barbecuing?
Grilling is the quick-cooking method where you put food over high, direct heat—think burgers sizzling moments after you close the lid. It’s perfect for thin cuts of meat, hot dogs, fish, and all the veggies you can fit. Barbecuing is the long-game. You cook meat low and slow, usually in a sealed grill or smoker, at a lower temperature and with indirect heat. That’s how brisket, ribs, and pulled pork get so deliciously tender and smoky. Grilling is fast; barbecuing is a flavor journey.
How do I use a gas grill versus a charcoal grill?
Both types of grills use direct and indirect heat the same way, but they light up differently.
- Gas Grill: Heat it up like the stove. Turn the knobs, press the ignitor, and it’s ready in minutes. You get precise temperature control—very handy when the recipe calls for “medium-high.” For two-zone cooking, turn one or two burners off, and the food will move away from the flames.
- Charcoal Grill: Light a pile of coals until they glow, then spread them for direct heat or bank them to one side for indirect heat. It takes a little longer to get hot, but the smoky flavor is one-of-a-kind, and you can toss in wood chips for added aroma.
Whichever you choose, they’re both great for the grill master’s game plan.
How can I make my grilled vegetables taste better?
For killer grilled veggies, skip the sugary or tangy marinades, since these can burn or make the veggies mush. Instead, swipe on a high-heat oil and sprinkle your favorite spices right before you hit the grill. To get that tender-yet-crispy magic, start the veggies over high, direct heat to build the char, then slide them to the cooler, indirect-heat side to finish without turning to mush. Working with denser veggies like potatoes? Give them a quick parboil or zap in the microwave first, so they finish evenly the moment they hit the grill.
Is it okay to use a plastic cutting board for raw meat and poultry?
Absolutely, plastic cutting boards are an excellent option for raw meat and poultry. Their smooth, non-porous surfaces and ability to go straight into the dishwasher for high-heat washing mean they can be easily sanitized. For safety, always keep a cutting board reserved just for handling raw meat. This keeps juices from touching other foods. Skip using wooden boards for meat prep; the tiny pores can trap bacteria, making them hard to clean completely.
What’s the best type of oil to use for grilling?
When you’re firing up the grill, stick with oils that can handle the heat. High smoke-point oils don’t break down and create smoke or undesirable flavors. The article suggests vegetable oil or avocado oil since both shine under high heat. Brush a light coat on your food and the grill grates to keep everything from sticking, plus create a great, golden-crisp crust you’ll be proud to serve.
Why should I choose metal skewers over wooden ones?
Wooden skewers may catch fire while grilling if they aren’t soaked ahead of time, turning safety into a worry. Metal skewers, on the other hand, won’t burn under high heat, making them a safer alternative. They’re reusable, saving money over time, and they heat up fast, cooking meat from the inside out. That helps your food cook more evenly, too. So swap the wood for metal and keep it simple.
How can I tell if my fish is fully cooked?
Fish cooks fast, and overcooking can dry it out. Look for a white, opaque appearance all the way through, and check if it flakes apart easily with a fork. For even more accuracy, a meat thermometer can confirm the fish has reached 145°F (63°C). If you’re cooking salmon, keep an eye out for a chalky white coating on the surface, called albumin. If you see it, the fish is close to done, and you’re nearly there!
Why Is a Clean Grill Super Important?
Keeping your grill spotless isn’t just a chore—it’s a must for safety and taste. When old crumbs and burned scraps stick around, they greet your fresh burgers, ribs, or veggies with unexpected char. This not only contaminates flavor but also can cause annoying flare-ups that scorch your meal. A spotless grate means everything slides off easily, heat spreads evenly, and your food ends up juicy, nicely seared, and ready to show off.
Can I Use a Fork to Flip My Meat?
Skip the regular needle-toothed fork! When you stab a steak, chicken breast, or chop, you create tiny holes that let flavorful juices escape, leaving you with a dry, tough bite. The juice is the delicious essence, and you want it staying right where it is. Instead, reach for tongs with a firm grip or a spatula with a wide, sturdy head. This way, you flip without puncturing, so the juices stay locked in for a tender, flavorful win every time.
How long should I really grill my vegetables?
Veggie grilling time isn’t one-size-fits-all. It depends on how firm the veggie is, how thick the pieces are, and how hot your grill is on that day. Check the full cheat sheet in the article for specific times. A quick rule is to start with those more solid vegetables, like sweet potatoes or corn on the cob. Let them cook for a few minutes, then toss on fast-finish veggies like asparagus or sliced bell peppers. When you pick up a piece with tongs, it should feel tender with a little resistance, not mushy. That’s your green light.